
So, let’s not wait around anymore and let’s check how long and how much to weld exhaust.
Repairing an exhaust leak should take two to three hours. It simply depends on how difficult accessing the exhaust manifold is. Conditions are rarely favorable when welding on an ancient exhaust system.
The time for welding the exhaust is 20 to 60 minutes. But the time required to weld an exhaust depends on the type of work. The time might be affected by the length of the tube. If your work is in aluminum or steel, there will be a substantial difference.
This is just a small part of the entire article. If you have time on your hand, you can try and find every detail to weld exhaust
What Is the Time Required to Weld an Exhaust?

Under optimum conditions, the welding process takes around 20 minutes. Conditions are rarely perfect when welding on an ancient exhaust system.
To weld exhaust pipes, all you need is a good set of welding equipment and some patience. Welding takes significantly longer than plating or brazing. And it is also related to the installation process.
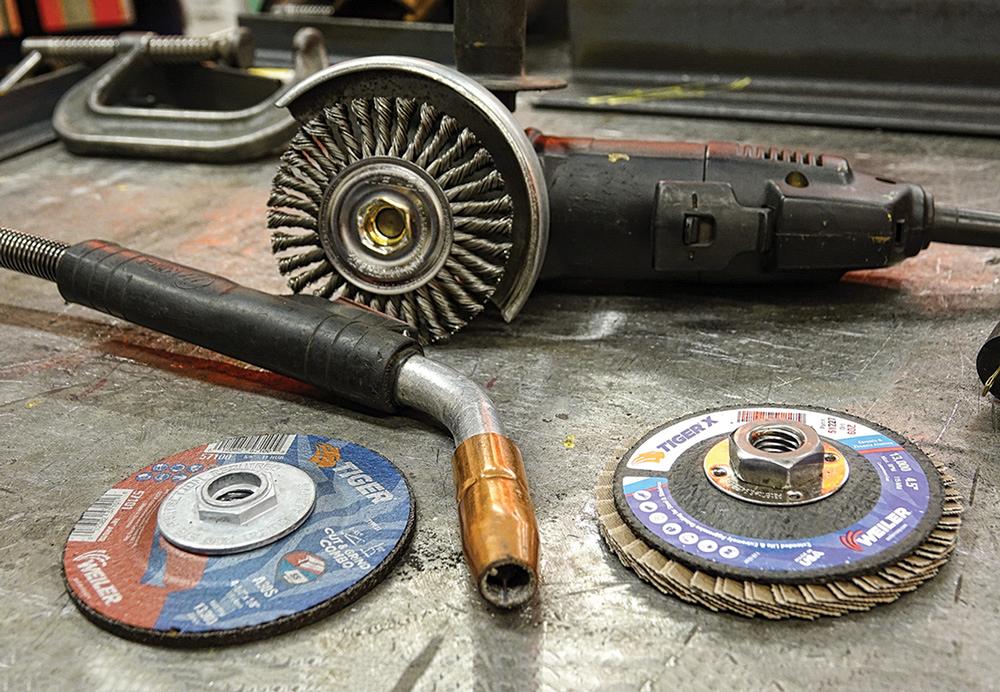
Before we start, here’s a list of a few types of equipment that you’ll need-
- Auto-Darkening Welding Helmet
- Welding Framing Jig
- MIG Welder
- Welding Gloves
- MIG Pliers
- Angle Grinder
- Oxy-Acetylene Setup
- Chipping Hammer
- Sheet Metal Gauge
- Metal File
- Welding Clamps
If you’ve gathered all the equipment, let’s see how long each step takes to weld exhaust-
Welding an Exhaust: Step-Wise Time Distribution
We have estimated the time required for every step of welding an exhaust pipe. We believe this can help you if you’re planning on doing this. Especially if you’re doing welding for the first time, this can come in quite handy.
Before starting, here’s a table explaining the time required for each step-
Now let’s get to the details of the steps.
| Step | Name of Step | Estimated Time |
|---|---|---|
| 1 | Cutting the Angle of the Pipe | 5 minutes |
| 2 | Cleaning Welding Area | >10 minutes |
| 3 | Setting Welder Correctly | 10-15 minutes |
| 4 | Tack Weld the Exhaust Pipe in Place | 12-15 minutes |
| 5 | Make Even Small Welds Around the Pipe | 5 minutes |
| 6 | Cleaning, Grinding, and Buffing | 10-15 minutes |
| Total Time | 60-75 minutes |
1. Cutting the Angle of the Pipe
First and foremost, you’ll need to cut the pipe to the desired angle. The simplest way to achieve this is to use a sharpie to mark the exact location where the two pipes must be aligned.
Before planning a spontaneous welding project, make sure you have this knowledge on hand.
Time: This step should not take more than 5 minutes.
2. Cleaning Welding Area
The next step is to fully clean the weld area. This is super important. The cleaner it is, the better the welding will penetrate the metal. As a result, the better the outcome.
Here’s a list of some cleaners that you can use in this case-
Time: This step will hardly take 10 minutes.
3. Setting Welder Correctly
It’s essential to set up your welder appropriately to avoid damaging your exhaust pipe. Or injuring yourself because something wasn’t set up right before you started welding.
The thickness of an exhaust pipe is only about 1/16”. Therefore, it’s critical to maintain low heat to avoid burning a hole in the pipe. which would effectively destroy it.
For this, you’ll need welding clamps. Here are a few of our recommendations.
If you weld at a higher temperature, you’ll have to move faster. By lowering the temperature just a little, you will be able to weld longer. You’ll also not have to pause in between.
Time: This step should take 10-15 minutes.
4. Tack Weld the Exhaust Pipe in Place
Tack welding your exhaust in the first place is a great idea. It’s to make sure it’s in the right spot before you start welding it in place.
By tack welding, you can create a rudimentary weld. You’ll figure out the proper position with just a few small tacks to hold it in place.
If you don’t do this before doing the actual welding, you’ll risk soldering the entire thing. So, you’ll discover later that it was welded on in the wrong position or just completely wrong.
Time: This is more like a precautionary step. So, we have allocated 12-15 minutes for this step.
5. Make Small Welds Around the Pipe Evenly
Small welds spaced evenly around the pipe can help to avoid overheating and melting through.
Time: If you’re in the flow of welding, it should take 2-3 minutes. Yet, these small welds should not take more than 5 minutes.
6. Cleaning, Grinding and Buffing the Weld
Finally, as you approach the finished result, there are a few things you can do. This will help to improve the exhaust’s appearance.
If the exhaust itself is entirely concealed, this isn’t a big deal. But if it’s visible, this is an excellent idea.
For this, you’ll need good-quality wire wool. Here are our top picks.
So, if it is visible and you want it to appear great, you can do this. All you have to do is clean, grind, and buff the weld to make it look seamless.
Time: This step should take 10-15 minutes.
That’s all folks. We hope it becomes easy for you now.
Frequently Asked Questions
Is it better to weld exhaust or clamp it?
Welding appears to make the junction between the components stronger than clamping. Clamps, on the other hand, make them just as sturdy.
How can I avoid the fume whole welding?
When welding there is a high chance of toxic gasses being produced by the metals. Fumes can be extremely cancerous, so consider buying a fume extractor. Or, you can buy one or two small fans to suck up the fumes from the air.
Why is it necessary to remove battery cables before welding?
A stray arc from the welder might fry the entire computer system in your car. Simply disconnect the battery wires for your safety and the safety of your vehicle.
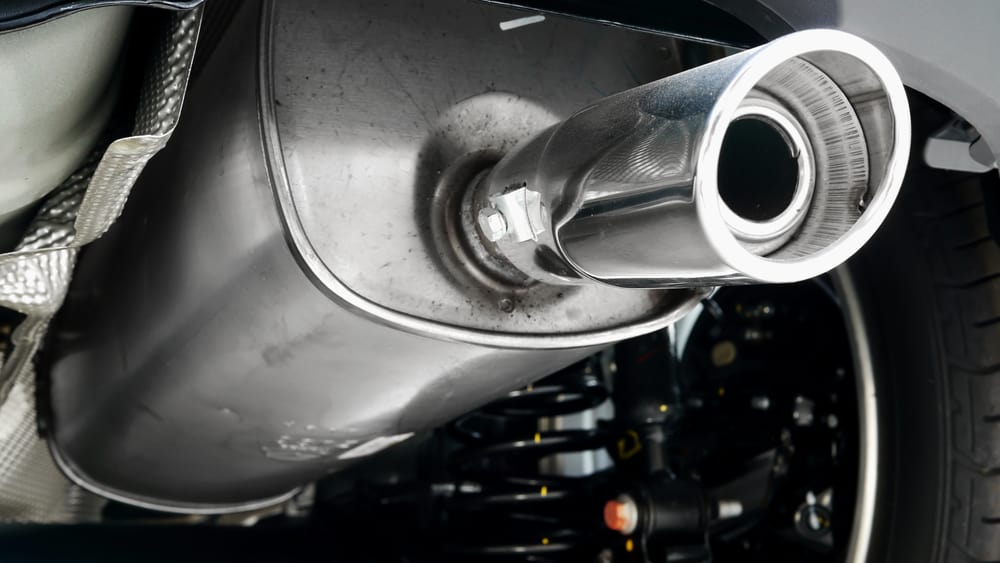
What are the common exhaust components that require welding?
Exhaust components prone to damage and requiring welding include mufflers, pipes, catalytic converters, and exhaust manifolds. Rust, corrosion, and road debris can cause these parts to develop leaks or cracks, necessitating welding repairs.
What type of welding method is commonly used for exhaust repairs?
MIG (Metal Inert Gas) welding is a popular method for exhaust repairs. It provides excellent control, allowing welders to create strong, clean, and precise welds. MIG welding is suitable for various exhaust materials, including steel and stainless steel, commonly used in exhaust systems.
Conclusion
In summary, determining the cost of welding an exhaust system depends on various factors, including the extent of damage, the type of vehicle, and the materials used.
Basic welding jobs, such as repairing small cracks or holes, are generally more affordable and can range from $50 to $200. However, for more complex issues like extensive rust or multiple repairs, the cost can increase significantly, potentially reaching up to $500 or more.
It’s essential to consult with reputable automotive shops or professional welders to obtain accurate quotes based on your specific requirements. Ultimately, investing in a high-quality welding job ensures the longevity of your exhaust system, minimizing the risk of future issues and maintaining optimal vehicle performance.
We hope now you know how much to weld exhaust. If you have any further questions, we are open to your doubts and queries.
Till then, all the best!
Read also: How to Install Bilstein 5100 Shocks on F150

- Ford Fusion Hybrid Battery Dead (Things to Understand) - September 17, 2022
- EcoBoost Noise When Accelerating (problems+Solutions) - September 17, 2022
- Ford Fusion Power Seat Problems (Here The Solutions) - September 17, 2022